User Interface Event Handling
In this tutorial you will build a simple FrontPanel Platform application that functions in a similar manner as the one in the ‘Application Development’ tutorial. The difference will be that this application will use components from the set of primitive React components to handle user interactions.
Install Prerequisites
- Node.js – Download | Node.js (nodejs.org)
- Node Package Manager – Downloading and installing Node.js and npm | npm Docs (npmjs.com)
- Source Code Editor
- FrontPanel Application version 6.0.0 or greater
- FrontPanel Application Template – FrontPanel App Template
- Counters Sample bitfile for your device – Opal Kelly Pins
Setup the FrontPanel App Project
Copy the FrontPanel Application template project to your workspace directory and use npm install to install the project’s dependencies. Test that the project is configured correctly by packaging then running the application.
Add Reset Button Event Handlers
In the project folder open the src/FrontPanel.tsx file in an code editor and locate the FrontPanel component class.
Add a constant member variable named _CounterReset to the FrontPanel component class. This will be used to specify the WireIn Endpoint that will be used to reset the counter.
import {
    EndpointAddressProps
} from "@opalkelly/frontpanel-react-components";Code language: JavaScript (javascript)
private readonly _Counter1Reset: EndpointAddressProps = {epAddress: 0x00, bitOffset: 0};Code language: PHP (php)Add two event handlers to the FrontPanel component class, one named OnResetButtonDown to capture when the user presses down on the Reset button, and another named OnResetButtonUp to capture when the user releases the button.
    private OnResetButtonDown() {
        console.log("ResetButton => Down");
        this.props.workQueue.post(async () => {
            this.props.frontpanel.setWireInValue(this._Counter1Reset.epAddress, 0xffffffff, 1 << this._Counter1Reset.bitOffset);
            await this.props.frontpanel.updateWireIns();
        });
    }

    private OnResetButtonUp() {
        console.log("ResetButton => Up");
        this.props.workQueue.post(async () => {
            this.props.frontpanel.setWireInValue(this._Counter1Reset.epAddress, 0x0, 1 << this._Counter1Reset.bitOffset);
            await this.props.frontpanel.updateWireIns();
        });
    }Code language: JavaScript (javascript)
Add Counter State Variable
In the src/FrontPanel.tsx file, locate the FrontPanelState definition and add a member named counterValue.
export interface FrontPanelState {
    counterValue: bigint;
}Code language: CSS (css)
Initialize the counterValue in the constructor of the FrontPanel component.
    constructor(props: FrontPanelProps) {
        super(props);

        this.state = {
            counterValue: BigInt(0),
        };
    }Code language: JavaScript (javascript)
Add FrontPanel UI Components
In the src/FrontPanel.tsx file, locate the render() function definition for the FrontPanel component.
    render() {
        return (
            <FrontPanelContext
                device={this.props.frontpanel}
                workQueue={this.props.workQueue}>
                <div className="ControlPanel">{/* TODO: Add your FrontPanel controls here */}</div>
            </FrontPanelContext>
        );
    }Code language: JavaScript (javascript)
Add a NumberDisplay component to display the counterValue and a Button component to capture onButtonDown and onButtonUp events.
import {
    Button,
    NumberDisplay,
    NumeralSystem
} from "@opalkelly/frontpanel-react-components";Code language: JavaScript (javascript)
render() {
return (
<div className="ControlPanel">
<NumberDisplay
label={{text: "Counter #1", horizontalPosition: "right", verticalPosition: "top"}}
tooltip="Counter #1"
value={this.state.counterValue}
maximumValue={BigInt(0xff)}
minimumValue={BigInt(0)}
numeralSystem={NumeralSystem.Decimal}
/>
<Button
label="Reset"
tooltip="Reset Counter #1"
onButtonDown={this.OnResetButtonDown.bind(this)}
onButtonUp={this.OnResetButtonUp.bind(this)}
/>
</div>
);
}Code language: JavaScript (javascript)Add Periodic Update Timer
Add a FrontPanelPeriodicUpdateTimer to the FrontPanelState interface. This timer will periodically retrieve the state of all FrontPanel WireOut Endpoints.
import {
    IFrontPanel,
    FrontPanelPeriodicUpdateTimer,
    WorkQueue
} from "@opalkelly/frontpanel-platform-api";Code language: JavaScript (javascript)
export interface FrontPanelState {
updateTimer: FrontPanelPeriodicUpdateTimer;
counterValue: bigint;
}Code language: CSS (css)Initialize the update timer in the constructor of the FrontPanel component.
    constructor(props: FrontPanelProps) {
        super(props);

        this.state = {
            updateTimer: new FrontPanelPeriodicUpdateTimer(this.props.frontpanel, 10),
            counterValue: BigInt(0),
        };
    }Code language: JavaScript (javascript)
Add an event handler named OnUpdateCounterValue to the FrontPanel component class. This handler will be used to retrieve the latest value of the counter when the updateTimer has issued a WireOutValuesChangedEvent notification.
    private OnUpdateCounterValue() {
        const wireValue = this.props.frontpanel.getWireOutValue(0x20);
        const counterValue = BigInt((wireValue >> 0) & 0xff);
        this.setState({counterValue: counterValue});
    }Code language: JavaScript (javascript)
Add a member variable named _WireUpdateEventSubscription to the FrontPanel component class. This will be used to store the subscription to the WireOutValuesChangedEvent so that it may be cancelled when it is no longer necessary to receive these events.
import {
    IFrontPanel,
    IEventSubscription,
    FrontPanelPeriodicUpdateTimer,
    WorkQueue
} from "@opalkelly/frontpanel-platform-api";Code language: JavaScript (javascript)
private _WireUpdateEventSubscription?: IEventSubscription = undefined;Code language: JavaScript (javascript)When the FrontPanel component is mounted, retrieve the initial value of the counter and subscribe to the wireOutValuesChangedEvent, then start the timer. When it is unmounted, cancel the subscription and stop the timer.
    componentDidMount() {
        this.OnUpdateCounterValue();

        this._WireUpdateEventSubscription = this.state.updateTimer.wireOutValuesChangedEvent.subscribeAsync(this.OnUpdateCounterValue.bind(this));

        this.state.updateTimer.start();
    }

    componentWillUnmount() {
        if (this._WireUpdateEventSubscription) {
            this._WireUpdateEventSubscription.cancel();
        }

        this.state.updateTimer.stop();
    }Code language: JavaScript (javascript)
Add the Counters Example Bitfile
Locate the counters.bit file that is compatible with the Opal Kelly XEM device that will be connected to the PC and copy or move it to the assets folder at the root of the application project.
Open the src/index.tsx file using the code editor and add an import statement that specifies the location of the counters.bit file relative to the source file.
import "../assets/counters.bit";Code language: JavaScript (javascript)This import statement tells the Webpack bundler to include this file in the application bundle it generates.
Open the App.tsx file using the code editor and set the configurationFilename parameter passed to the initializeDevice() function to counters.bit.
function App() {
    const [frontpanel, setFrontPanel] = React.useState<IFrontPanel>();

    React.useEffect(() => {
        let device: IDevice;

        DeviceWorkQueue.post(async () => {
            try {
                device = await initializeDevice("", "counters.bit");

                const frontpanel = await device.getFPGA().getFrontPanel();

                setFrontPanel(frontpanel);
            }
            catch (error) {
                device?.close();
                console.error(error);
            }
        });Code language: JavaScript (javascript)
Build and Run the Application
npm run packConnect a USB cable from the PC to the OpalKelly XEM device and power on the device.
Launch the FrontPanel Platform application and in the Open dialog navigate to the folder where the FrontPanel App package is generated and select the app.asar file.
The application should run, and it should function in the same manner as it did in the ‘FrontPanel Application Development’ tutorial. The current value of Counter #1 should display. Clicking the Reset button should result in restarting the counter at the value zero.
Inspect the Chrome DevTools Console log
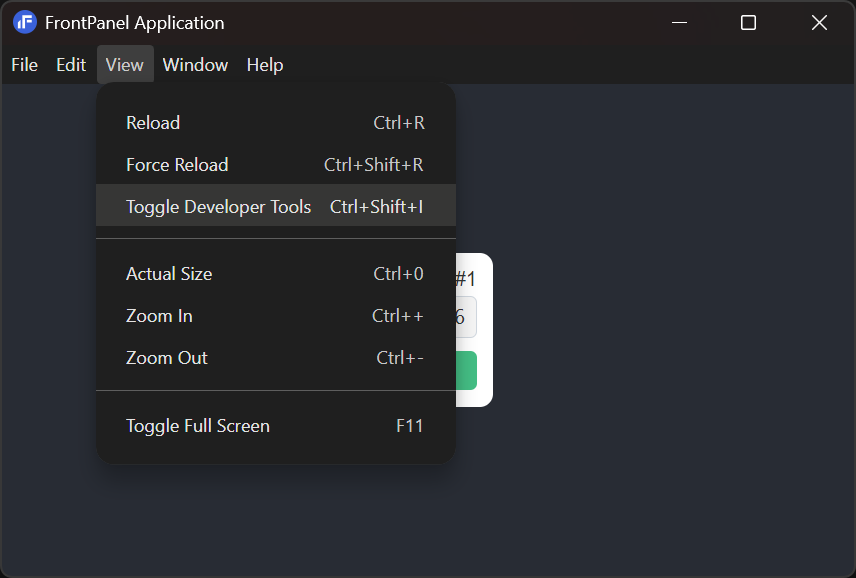
Open the Chrome DevTools panel by selecting View->Toggle Developer Tools from the menu.
In the Chrome DevTools panel click the ‘console’ tab.
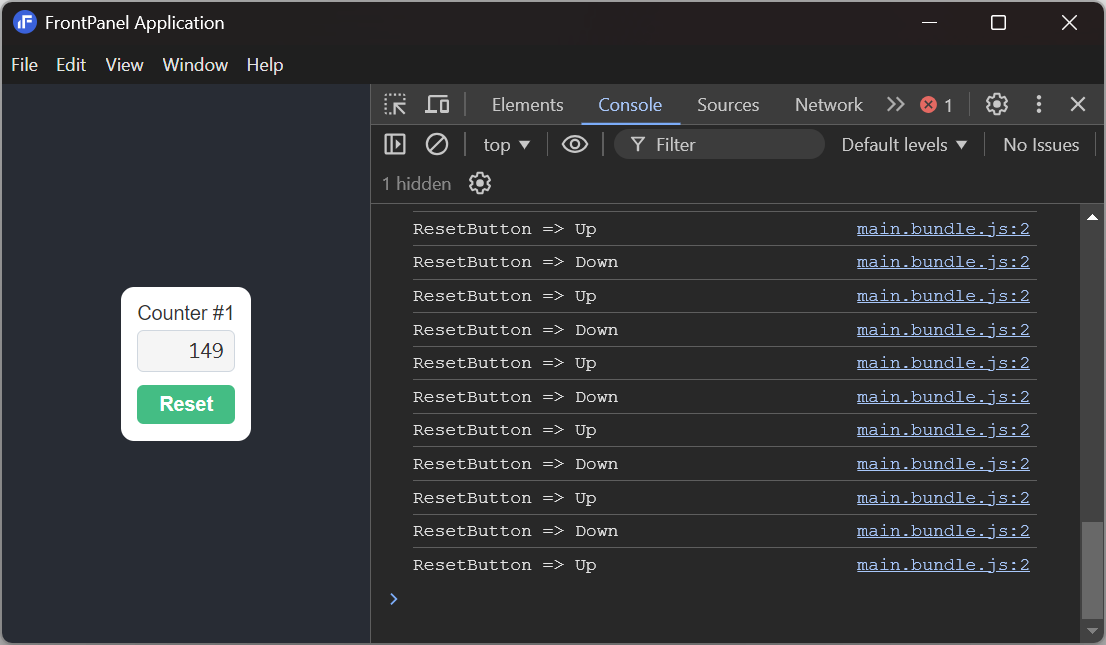
Verify that a message is added to the log each time the Reset button is clicked. The console is useful for tracking down the source of problems with the user interface. Sometimes a button is clicked, and nothing happens. By adding a log message to the console, you can quickly determine if the event handler is being called in response to the user interaction.