Bootstrapping a FrontPanel App
This guide will show how to set up a FrontPanel application project from scratch using common tools such as Webpack, Typescript and the React user interface development library. If you’d prefer to start with a more substantial template, refer to our FrontPanel App Template guide. The template was created using a workflow very similar to what is presented here.
FrontPanel Apps are built as Node.js projects. The project will be used to contain all of the sources and additional assets required. Once complete, the project will then create a deployable application package similar to how many web apps are created and deployed. Instead of deploying to a cloud host, the package will be executed by the FrontPanel Platform.
Install Prerequisites
- Node.js – Download | Node.js (nodejs.org)
- Node Package Manager – Downloading and installing Node.js and npm | npm Docs (npmjs.com)
- Source Code Editor (e.g. Visual Studio Code)
- FrontPanel Platform version 6.0.0 or greater
Create the Application Project
Create a directory for the application project and set it to be the current directory.
mkdir my-frontpanel-app
cd my-frontpanel-appCode language: Bash (bash)
Creating a New Node.js Project
Create the package.json file using npm:
npm initCode language: Bash (bash)This command asks a number of questions that simply populate the common parameters in a package.json file, many of which are optional. You can learn more about this file in the npm package.json documentation.
Set Up TypeScript
Install the Typescript compiler (tsc) to transpile Typescript code into JavaScript, and ts-node tool to allow you to run TypeScript files directly without manually compiling them.
npm install --save-dev typescript ts-node @types/nodeCode language: Bash (bash)Create a tsconfig.json file in the project directory and add the content from our template:
tsconfig.json(GitHub link)
Note that the target parameter establishes the ES6 JavaScript as the target to allow the use of modern JavaScript features while also ensuring compatibility with the FrontPanel Platform. We’ve also included jsx because many of our examples are built with React. Finally, we enable generation of source maps which help in debugging and editors.
Learn More
Most of the configuration here is boilerplate, but you can learn more at TypeScript: TSConfig Reference – Docs on every TSConfig option.
Set Up Webpack Bundler
Next, install Webpack development tools. Webpack is a “bundler” which creates a deployable application bundle from all of the sources, assets, and dependencies. It is this final bundle that becomes the FrontPanel Platform App.
npm install --save-dev webpack webpack-cli webpack-dev-server style-loader css-loader ts-loader html-webpack-plugin copy-webpack-plugin webpack-mergeCode language: Bash (bash)Create a webpack.common.js file (and the other files below) in the project directory and add the referenced content. Note here that we’ve added FPGA bitfile resources (*.bit) to the types of assets that appear in bundled assets. This is somewhat unique to FrontPanel Platform Apps.
webpack.common.js(GitHub link)webpack.dev.js(GitHub link)webpack.prod.js(GitHub link)
Edit the package.json file in the project directory so that the content of the “scripts” section is as follows:
"scripts": {
  "build:dev": "webpack --config webpack.dev.js",
  "build": "webpack --config webpack.prod.js",
  "start": "webpack serve --config webpack.dev.js",
  "test": "echo \"Error: no test specified\" && exit 1"
},Code language: JSON / JSON with Comments (json)
Learn More
Set Up ASAR
Install ASAR development dependencies. This package provides tools that are used to create and manage ASAR packages — the types of packages used to contain FrontPanel Platform Apps.
npm install --save-dev --engine-strict @electron/asar@^3.4.1Code language: Bash (bash)Edit the package.json file in the project directory to add “pack:dev” and “pack” elements to the “scripts” section:
"scripts": {
    "pack:dev": "webpack --config webpack.dev.js && asar pack ./dist ./output/app-dev.asar",
    "pack": "webpack --config webpack.prod.js && asar pack ./dist ./output/app.asar",
    "build:dev": "webpack --config webpack.dev.js",
    "build": "webpack --config webpack.prod.js",
    "start": "webpack serve --config webpack.dev.js",
    "test": "echo \"Error: no test specified\" && exit 1"
  },Code language: JSON / JSON with Comments (json)
Set Up React
If your application is going to be built with React, you will want to install the React dependencies and development dependencies.
npm install react@^18.3.1 react-dom@^18.3.1
npm install --save-dev @types/react@^18.3.12 @types/react-dom@^18.3.1Code language: Bash (bash)
Install Radix-UI
If your application is going to use Radix-UI themes components from its pre-styled component library, you will want to install that dependency.
npm install @radix-ui/themesCode language: Bash (bash)Install the FrontPanel Platform API
Finally, install the FrontPanel Platform API Library.
npm install @opalkelly/frontpanel-platform-apiCode language: Bash (bash)Setup VSCode configurations (optional)
Create a .vscode folder at the root of the project then copy the tasks.json and launch.json files from the template.
.vscode/tasks.json(Github link).vscode/launch.json(Github link)
Open the tasks.json file and locate the Launch FrontPanel App (production) and Launch FrontPanel App (development) tasks. Each of these tasks define a command that you will need to ensure point to the correct location of the FrontPanel-Platform executable.
Add Application Assets
Create an assets folder within the your application project.
Locate the Templates folder that was installed by FrontPanel 6. On MacOS and Linux this folder will be in the downloaded package.
Then copy the contents of the frontpanel-react-app/assets folder into the new folder you just created.
Note here that the assets that are copied include FPGA bitfile resources (*.bit) for every supported product.
Add Application Manifest
Create a frontpanel-app.json file in the project directory and add the content from our template:
frontpanel-app.json(Github link)
The contents of this file is necessary to allow your application to be installed using the FrontPanel Platform App launcher.
Add Application Information
Create an APP-INFO.md file in the project directory and add the content from out template:
APP-INFO.md(Github link)
This file provides content that is displayed in the application info dialog presented to the user when they click the information icon in the FrontPanel app launcher.
Add Application Sources
Create a src directory within the application project directory and add the following files. These files are the entry point for the application. The FrontPanel Platform loads the index.html to start the application. This file defines an html <div id="root"> element that is necessary for React to work.
src/index.html(Github link)src/index.tsx(Github link)src/index.css(Github link)
Add the src/declarations.d.ts file to the project. This file has a declaration needed to bundle *.png files with the app.
src/declarations.d.ts(Github link)
Add the src/FPGAConfigurationFiles.ts that lists out separate import statements for each of the bitfiles that will be bundled with the application.
src/FPGAConfigurationFiles.ts(Github link)
Then add the App.tsx and App.css files that define the root App component for the user interface. This is where the application setup of the device is performed. This includes opening the device, configuring the FPGA, and retrieving an interface to the FPGADataPortClassic interface.
src/App.tsx(Github link)src/App.css(Github link)
Next, add the FrontPanel.tsx and FrontPanel.css files that define the FrontPanel component that maintains the current state of the counter and handles button events.
src/FrontPanel.tsx(Github link)src/FrontPanel.css(Github link)
This component has two event handlers, one named onResetButtonDown to capture when the user presses down on the Reset button, and another named onResetButtonUp to capture when the user releases the button. Each event handler wraps the setWireInValue and updateWireIns operations in a task, which is then posted to the device’s WorkQueue. The WorkQueue ensures that tasks are executed in order, so each task waits for previous tasks to finish before running. By wrapping these FPGA operations in a task, we guarantee that the device receives commands in a controlled, sequential manner, even when multiple user interface events occur rapidly or asynchronously.
For more information about the WorkQueue, see the Work Queue guide.
Build and Package the Application for Production
Create the production application package using the following command. This command will produce a package named app.asar and place it in the output directory in the project folder. (output/app.asar)
npm run packCode language: Bash (bash)Build and Package the Application for Development
Create the development application package using the following command. This command will produce a package named app-dev.asar and place it in the output directory in the project folder. (output/app-dev.asar)
npm run pack:devCode language: Bash (bash)Run the Application
Connect a USB cable from the PC to the OpalKelly XEM device and power on the device.
Run the app using the command line, providing the --app-package argument set to the full path of the app.asar file, including its filename and extension.
MS Windows
Here is an example assuming the full path to the FrontPanel Platform executable is C:\Program Files\Opal Kelly\FrontPanel-Platform\Platform\FrontPanel-Platform.exe and the application package was built in C:\my-frontpanel-app\output.
"C:\Program Files\Opal Kelly\FrontPanel-Platform\Platform\FrontPanel-Platform.exe" "--app-package=C:\my-frontpanel-app\output\app.asar"Code language: Bash (bash)Note that in Windows Powershell the command will need to be prefixed with a ‘&’.
& "C:\Program Files\Opal Kelly\FrontPanel-Platform\Platform\FrontPanel-Platform.exe" "--app-package=C:\my-frontpanel-app\output\app.asar"Code language: JavaScript (javascript)macOS
Here is an example assuming the FrontPanel Platform application was installed (copied to) the system Applications folder and the application package was built in $HOME/Desktop/my-frontpanel-app/output/app.asar.
"/Applications/FrontPanel Platform.app/Contents/MacOS/FrontPanel-Platform" --app-package=$HOME/Desktop/my-frontpanel-app/output/app.asarCode language: Bash (bash)Linux
Here is an example assuming the full path to the FrontPanel Platform executable is $HOME/Desktop/FrontPanel-Linux/FrontPanel-Platform/frontpanel-platform and the application package was built in $HOME/Desktop/my-frontpanel-app/output/app.asar.
$HOME/Desktop/FrontPanel-Linux/FrontPanel-Platform/frontpanel-platform --app-package=$HOME/Desktop/my-frontpanel-app/output/app.asarCode language: PHP (php)The application should load and display the current value of the counter.
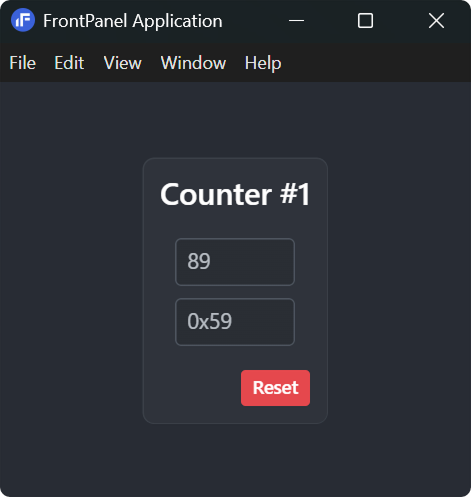
Pressing and holding the Reset button should stop the counter and reset the current value to zero. Once the button is released, the counter should resume.